Quick Start Part 2: Agentic Flows in 5 Minutes
Editions: OSS, Cloud, Enterprise. Unless stated otherwise, everything on this page ships in OSS.
Build an event-driven workflow that uses your protected tools with an AI agent.
Prerequisites
Complete Part 1: Safety Layer first to set up your account, policies, and protected tools.
What You'll Accomplish
- Configure an AI model for your flows
- Create an automated payment processing flow
- Trigger the flow and see the approval workflow in action
- Learn how to trigger flows via webhooks
Step 1: Create Your AI Model (1 minute)
Flows need an AI model to execute tasks. Let's add one.
- Open Flows in the sidebar
- Click Create flow (the presets further down the page can wait)
- Under AI model, click Add AI model
-
Fill in:
- Name:
GPT-5.4 - Type: Inference / chat
- Provider:
OpenAI - Model Name / ID:
gpt-5.4 - API key: Your OpenAI API key
- Name:
-
Click Save
You can also add models under Models > Add model.
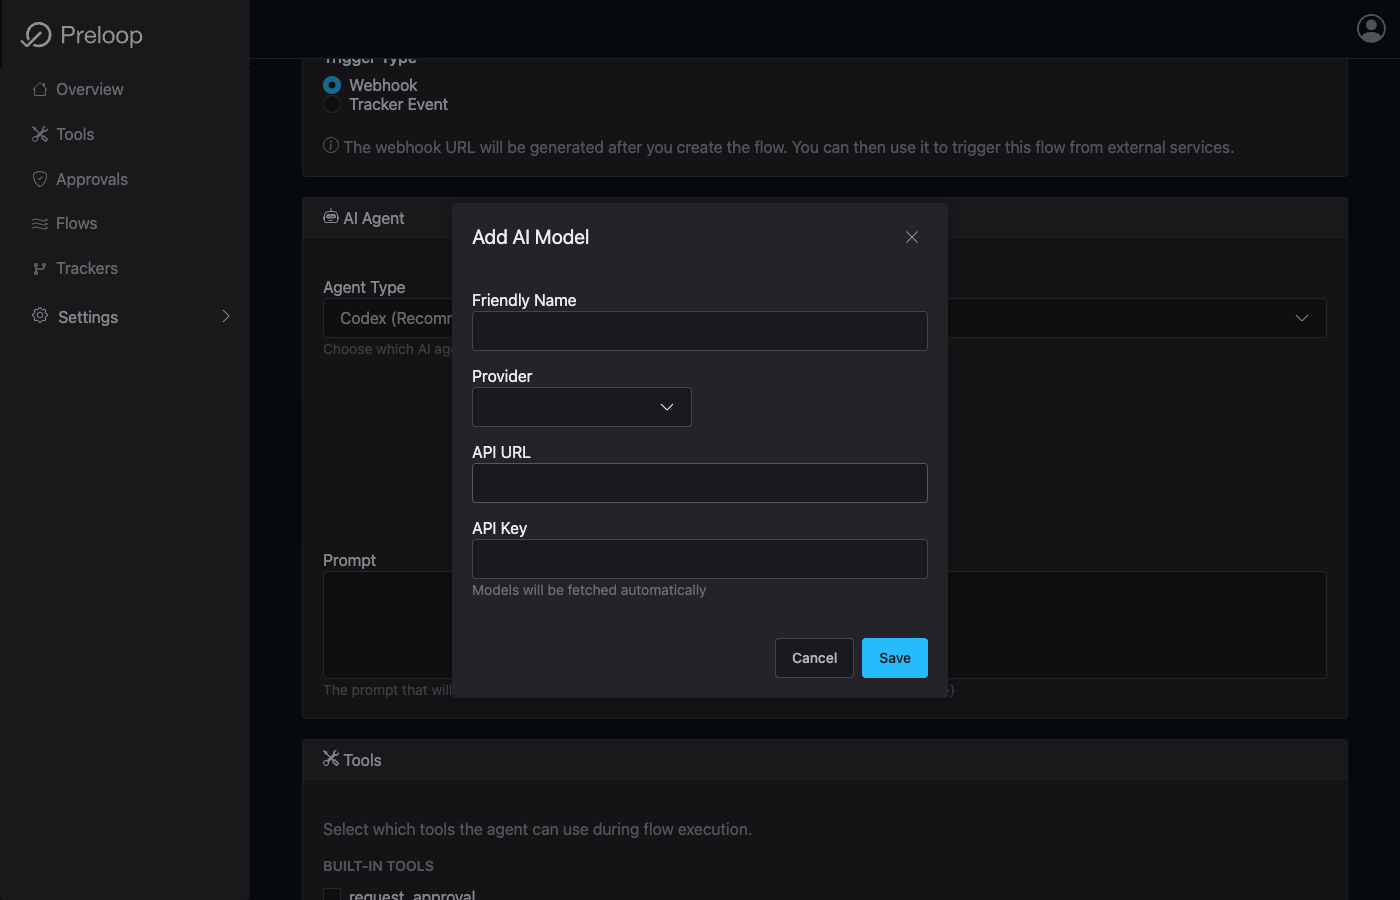 The Add model dialog. Model Name / ID appears after Fetch models from provider, or as a text field if the fetch fails.
Don't Have an OpenAI Key?
Get one at platform.openai.com/api-keys, or add a model from any other supported provider.
✓ Checkpoint: You now have an AI model configured!
Step 2: Create a Payment Approval Flow (2 minutes)
Let's create a flow that processes contract payments. If the amount exceeds your threshold, it will require approval.
Flow Scenario:
When triggered (manually or via webhook), the flow will:
- Receive payment details (recipient, amount, contract_id)
- Use the prelooped
paytool to send payment - If amount exceeds the condition, require approval first
- Report the result
Create the Flow:
-
You're already on the Create Flow page. Fill in:
-
Flow name:
Contract Payment Processor - Description:
Process contract payments with approval for large amounts - Trigger type: Webhook (the webhook URL is generated after creation)
- AI model: the model you just added
-
Prompt template:
You are a payment processor. Process the payment with these details:

Recipient: {{trigger_event.payload.recipient}}
Amount: ${{trigger_event.payload.amount}}
Contract ID: {{trigger_event.payload.contract_id}}

Use the pay tool to send the payment. The tool is configured with
an approval workflow - small amounts are auto-approved, larger amounts
require human approval.

After payment completes, report the status. Do not retry if declined.
Under MCP Server Tools, make sure pay is checked. You can uncheck other tools.
- Click Create flow at the bottom
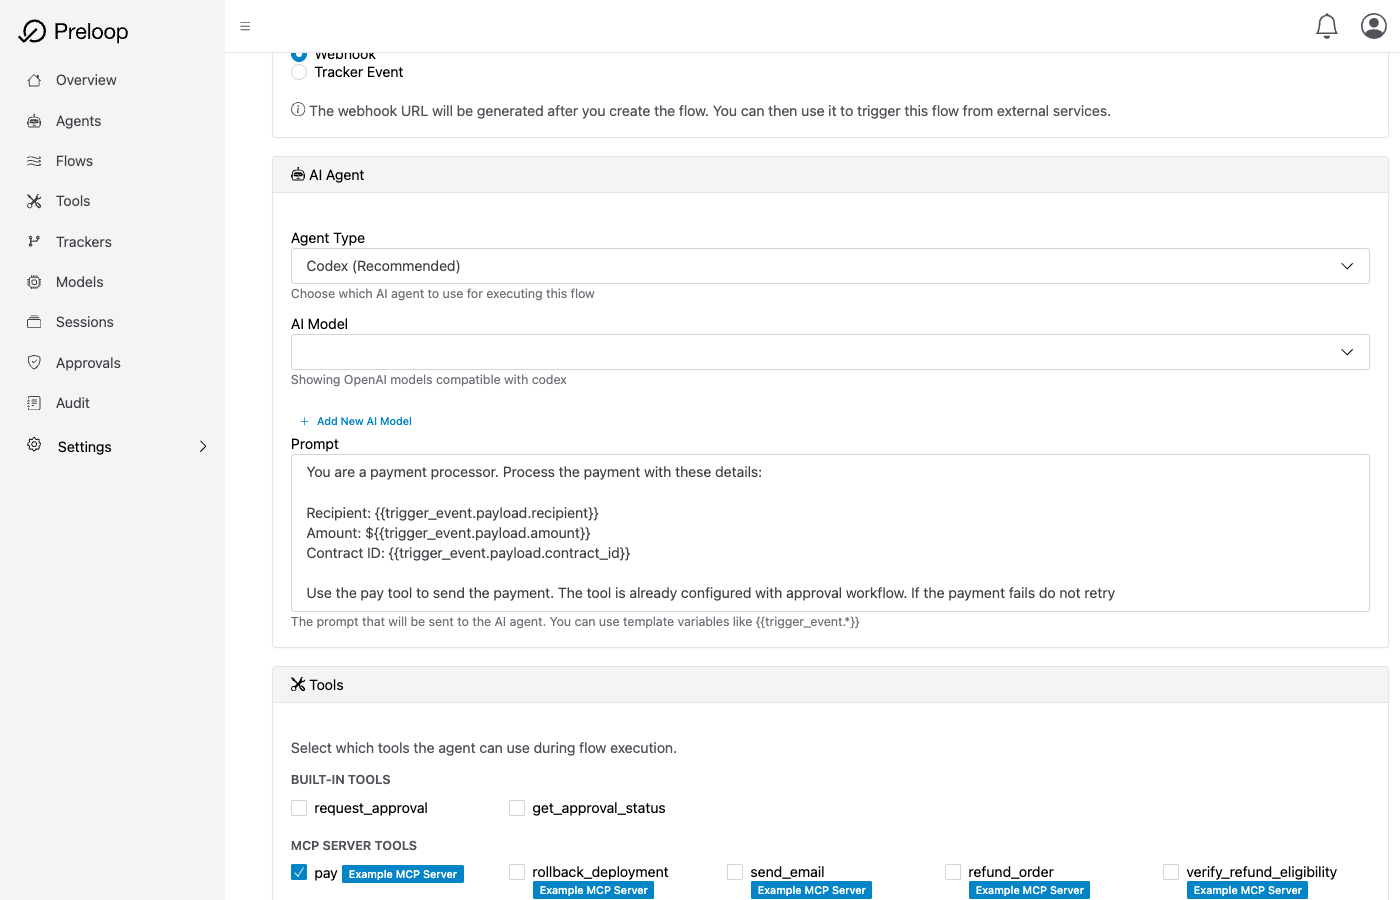 The tools section of the new flow, with pay checked under MCP Server Tools
✓ Checkpoint: Your flow is created!
Step 3: Test Your Flow (2 minutes)
Now let's trigger your flow and see the approval workflow in action!
Trigger the Flow:
- You should now be on the flow details page (flows you create start enabled)
- Click Run now
- The dialog Values for the trigger event asks for the template variables. The run is a real one and spends like any other
-
Fill in:
- trigger_event.payload.recipient:
contractor@example.com - trigger_event.payload.amount:
150(above the $100 auto-allow limit from Part 1) - trigger_event.payload.contract_id:
CONTRACT-2026-001
- trigger_event.payload.recipient:
-
Click Run now
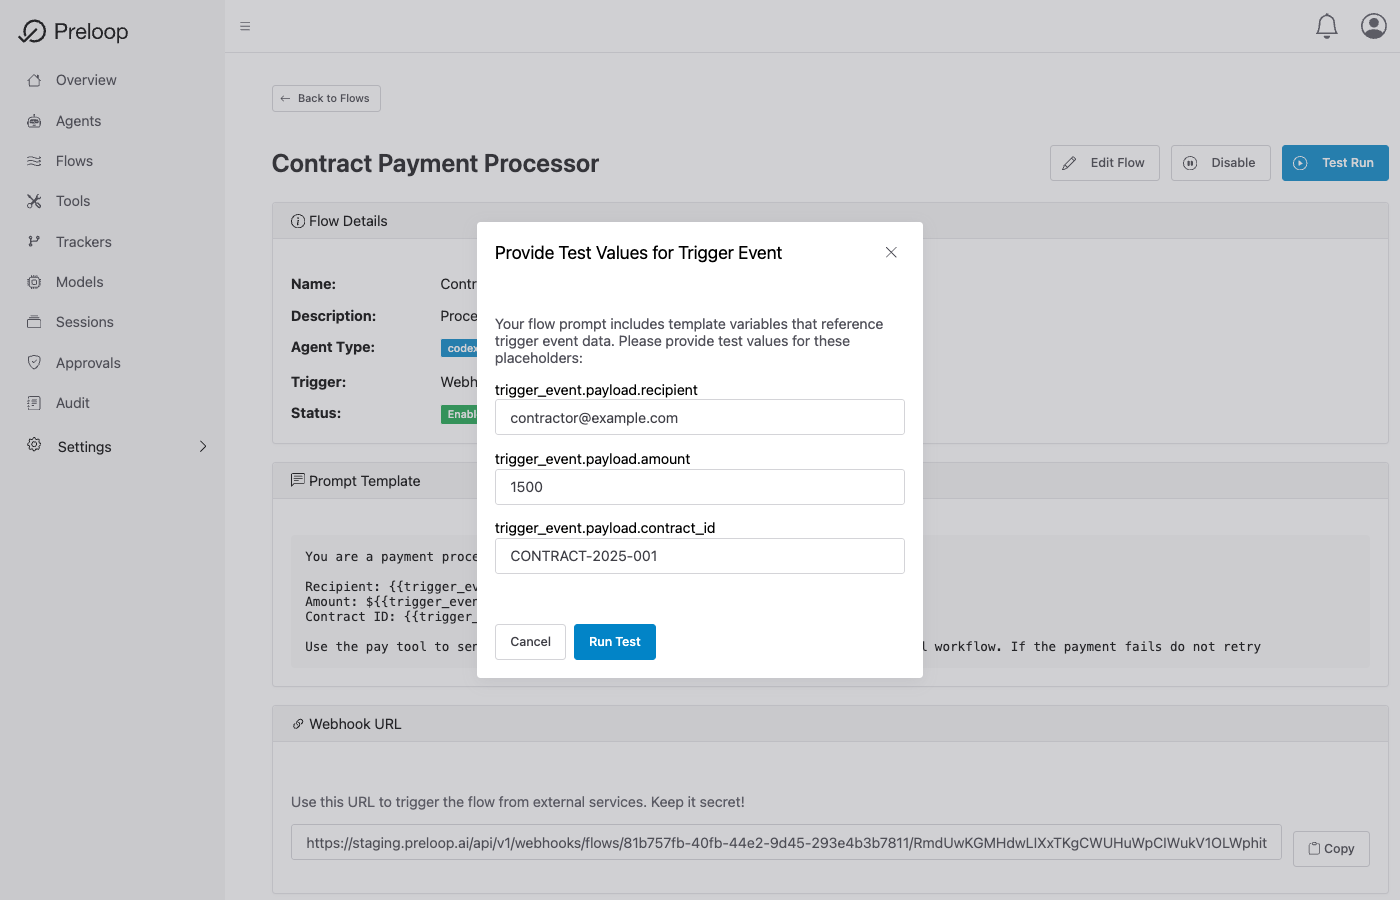 Running the flow with sample payment data, which triggers the approval workflow
Watch the Execution:
You'll be redirected to the execution page where you can see the AI agent working:
- The agent will read your prompt
- It will attempt to call the
paytool with amount=$150 - Because of the rules you set on
payin Part 1, the Support workflow gets an approval request
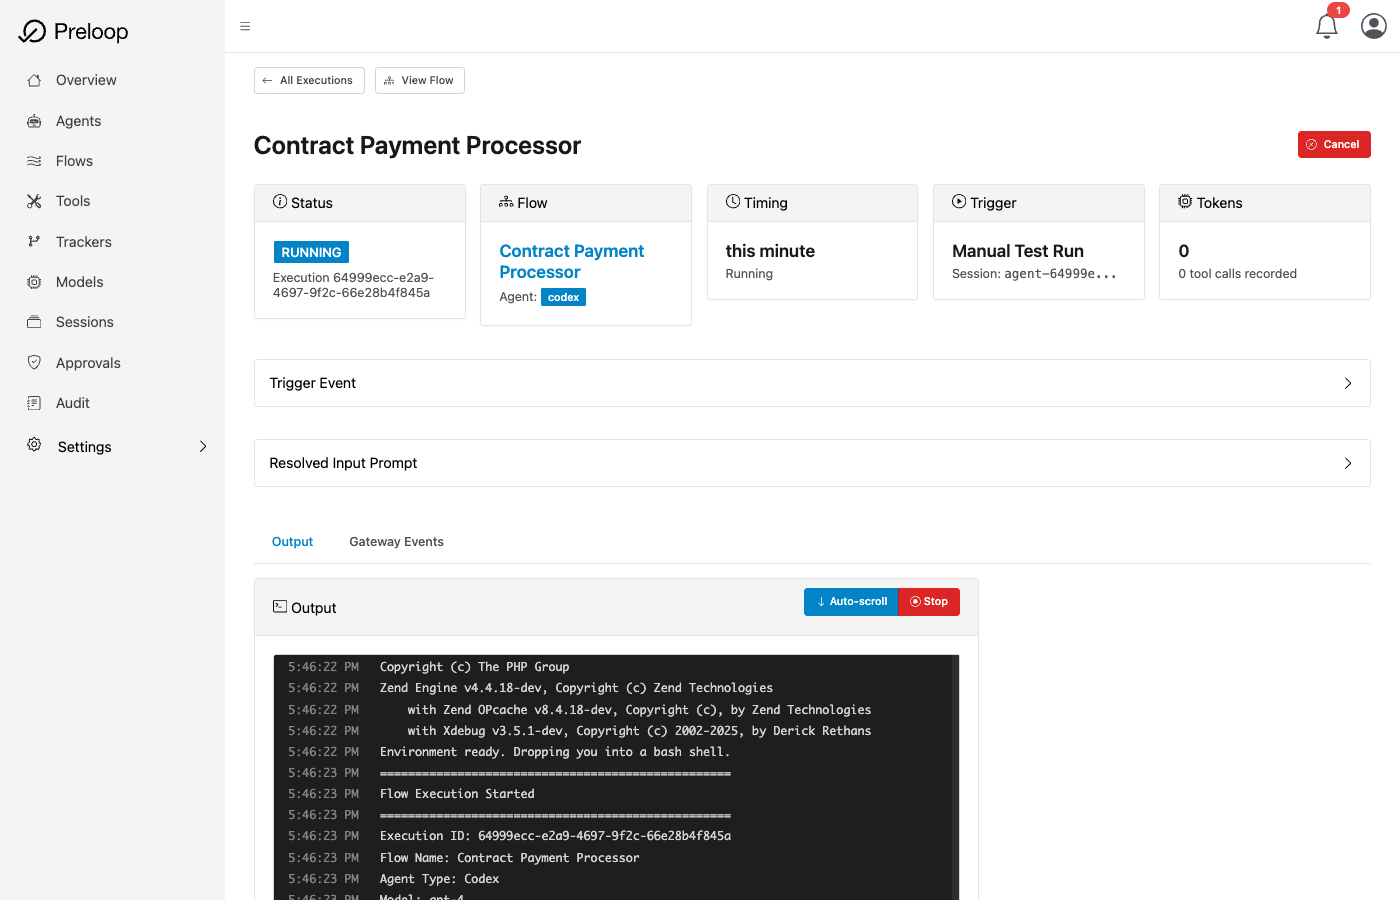 Flow execution in progress: the AI agent is processing the request
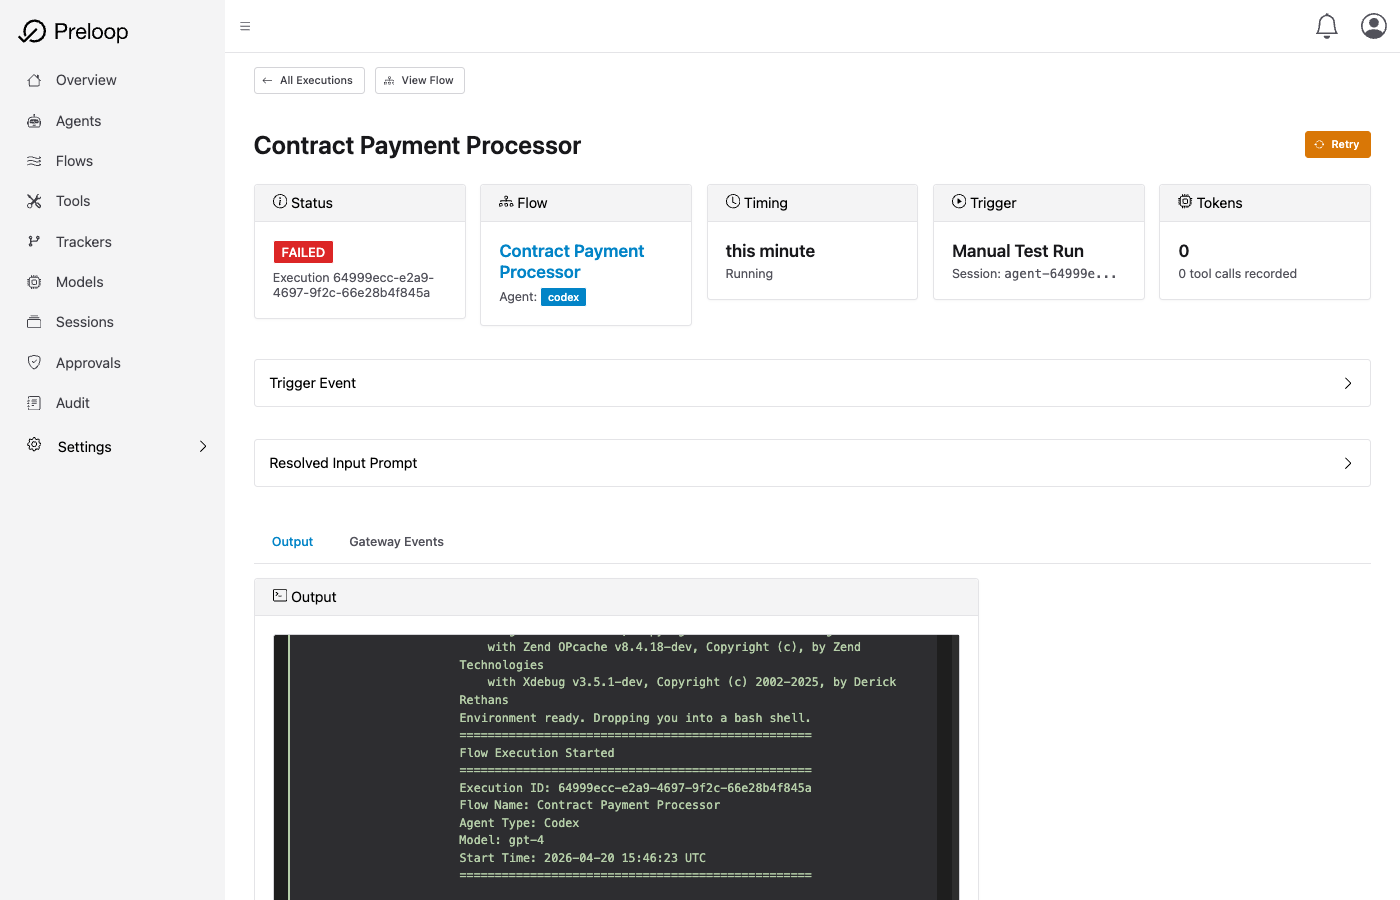 The run is waiting for the Support workflow to approve the payment
Approve the Payment:
The approver receives an email with a subject such as "Tool Approval Required: pay" (when the agent names itself or summarizes the request, the subject says so instead).
- Click Approve in the email, or:
- Approve from Audit > Approvals in the console
- Approve from the mobile app
- Go back to the flow execution page
- Watch the agent complete the payment after your approval!
✓ Checkpoint: You've successfully run an automated flow with human approval!
Triggering via Webhook
Your flow has a unique webhook URL. You can trigger it from external services!
- Go back to your flow details page
- Find the Webhook URL section
- Copy the URL (looks like:
https://preloop.ai/api/v1/webhooks/flows/{flow_id}/{webhook_secret})
Test with curl:
curl -X POST 'YOUR_WEBHOOK_URL' \
  -H 'Content-Type: application/json' \
  -d '{
    "recipient": "vendor@example.com",
    "amount": 50,
    "contract_id": "CONTRACT-2026-002"
  }'
This payment runs without approval because it is at or below $100.
Try with a larger amount:
curl -X POST 'YOUR_WEBHOOK_URL' \
  -H 'Content-Type: application/json' \
  -d '{
    "recipient": "vendor@example.com",
    "amount": 500,
    "contract_id": "CONTRACT-2026-003"
  }'
This one needs the CFO workflow's approval. Anything above $1,000 is denied by the last rule.
Success! You've Built Safe Automation
You've just:
- Set up the Safety Layer: protected a risky tool with policies (Part 1)
- Built an automated workflow: created a flow with an AI agent
- Tested end-to-end: triggered the flow, got approval request, watched it execute
- Learned webhook triggers: you can now trigger flows from external services
What's Next?
Learn the flow building blocks:
Go deeper on how flows are created, triggered, and executed:
- Creating Flows: build reusable AI-driven workflows
- Flow Triggers: understand webhooks and other trigger types
- Flow Execution: inspect status, history, and outcomes
Creating Flows → | Flow Triggers → | Flow Execution →
Advanced Approval Workflows:
Make approval smarter with conditional logic:
- Approve only if
environment == "production" - Different approvers for different amounts
- Team-based approval with quorum (require 2 of 5 approvers), Cloud and Enterprise
- Escalation chains, Cloud and Enterprise
Conditional Approval (CEL) → | Team-Based Approvals →
Connect Your Own MCP Servers:
Put tools from any MCP server behind Preloop:
- Deployment tools
- Database operations
- Cloud provider APIs
- Your custom MCP servers
Learn More
Core Concepts:
- MCP Integration: how Preloop protects MCP tools with policies
- Policy-as-Code: generate and manage policies programmatically
Flows:
- Creating Flows: complete guide
- Flow Triggers: all trigger types
- Flow Execution: monitoring and debugging
Advanced:
- Team-Based Approvals: approver groups, inherited roles, and quorum behavior
- Mobile Apps: approve from iPhone, iPad, Apple Watch, or Android
- External MCP Tools: protect tools from your own MCP servers